
Step-by-Step: Repairing a Guitar Neck Ding or Dent
As a guitarist, nothing beats the smooth feel of a well-finished neck. My Suhr Modern Plus is one of my all-time favourites, but recently, disaster struck, my son accidentally made a small ding on the back of the neck. While the ding wasn’t immediately noticeable, it disrupted the playing experience and became something I couldn’t ignore.
After researching, I discovered a simple yet effective way to fix the ding using CA glue. In this guide, I’ll walk you through the entire process, step by step.

Can You Fix a Ding on a Finished Guitar Neck?
If your guitar neck has a ding, the repair method depends on whether the wood is finished or bare. For bare wood, steam can lift the dent. However, for finished guitar necks, steam won’t work and you can damage the finish as well, and you’ll need to fill the dent with CA glue.
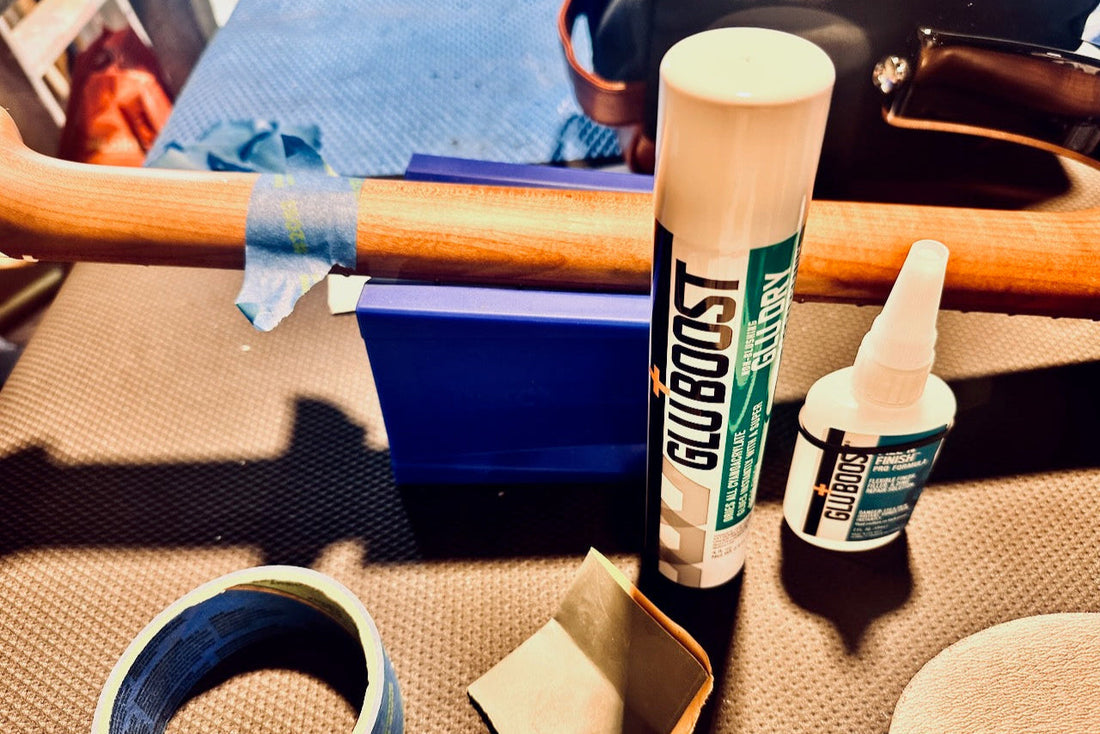
I used Glueboost Fill n’ Finish Pro Formula, a low-viscosity CA glue ideal for guitar repairs. Glueboost also offers thinner formulas like Thin and Ultra Thin, but I chose Pro Formula for better control and a smoother finish.
Step-by-Step: Repairing a Guitar Neck Ding
1. Clean the Area
Start by cleaning the area around the ding. I used Shellite (also known as Naphtha) to remove any dust, oils, or residue that might interfere with the repair.
2. Mask the Area
Use masking tape to protect the rest of the neck. Carefully tape around the ding, leaving just the damaged area exposed. This ensures the glue doesn’t spill onto the surrounding finish.
3. Apply the CA Glue
Place a few drops of CA glue on a paper surface, then use a thin needle tool to apply the glue directly to the ding. Once the dent is filled, spray a Glueboost accelerator to speed up drying. This saves you time and ensures the glue sets properly.
4. Level the Glue
Once the glue is dry, use a utility blade to carefully scrape off any excess. Wrap masking tape around the blade’s edges to protect the neck’s finish, leaving only the centre exposed for precision scraping. Use a backlight to identify high spots and ensure the surface is level.

5. Sand the Surface
Wrap 2000-grit sandpaper around a socket or similar cylindrical object to create an even sanding surface. Gently sand the area with minimal pressure, frequently checking for high spots with your eyes and fingertips.
6. Blend the Finish
After levelling the repair, remove the masking tape and lightly sand the filled area along with the surrounding neck, I was using the 2000 grit sandpaper. This step helps blend the repair seamlessly into the original finish. Again, use a backlight and feel for any unevenness.
7. Restore the Satin Feel
To match the neck’s original satin finish, use a grey Scotch-Brite pad (You can find it in the Automotive store). Sand the area lightly to remove any gloss left by the fine sandpaper, ensuring the neck feels smooth and consistent.

Pro Tips for a Flawless Repair
-
Use the Right Cleaning Agent: Shellite (Australia) or Naphtha (elsewhere) is ideal for cleaning during the process. It prevents buildup and helps you spot high spots easily.
-
Work Slowly: Rushing can lead to over-sanding or uneven results. Check your progress frequently under good lighting.
-
Use Minimal Pressure: Let the tools do the work. Heavy pressure can damage the surrounding finish.
FAQs About Fixing Guitar Neck Dings
Q: Can I use steam to fix a ding on a finished guitar neck?
A: Steam only works on bare wood. For finished necks, you’ll need to fill the ding with CA glue, as described in this guide.
Q: What is the best CA glue for guitar repairs?
A: Glueboost Fill n’ Finish Pro Formula is an excellent choice. It offers a smooth finish and works well on dings and dents. You can find it in the Southern Tone Woods shop if you are in Australia.
Q: Can I sand the repair with lower-grit sandpaper?
A: If you’re very skilful at sanding, you can use lower-grit sandpaper to speed up the process. However, I recommend using higher-grit sandpaper, such as 2000-grit, for better control and to minimise the risk of removing too much material.
Conclusion
Repairing a ding on a finished guitar neck may seem intimidating, but with the right approach, it’s entirely manageable. Have you tried fixing a guitar ding yourself? Share your experience or tips in the comments below. I’d love to hear from you!
If you need our help, shoot us an email at info@nuancelabguitars.com.au, we are more than happy to service your guitars.